databasedev.co.uk - database solutions and downloads for microsoft access
Microsoft Access Articles
- General Microsoft Access Articles
- Microsoft Access 2007 Articles
- Tables
- Queries
- SQL
- Forms
- Reports
- Macros
- Modules & VBA
- Data Models
- Downloads
GUI Design
Resources
Online Shop
Info
Microsoft Access OleDB Connection
Access 2000 and ActiveX Data Objects:
Introduction
With Access 2000, Microsoft made a major shift in paradigm as to accessing data from various sources. It made a complete volte- face and made a single COM (Component Object Model) interface, the OleDB to replace the much loved, use friendly DAO (Data Access Objects), ODBC (Open database connectivity), RDO, and the various API's. ADO and ADOX ( ADO's extensions) became the core technology for MS Access and the various related Office products.
After the introduction of the .NET framework and the Visual Studio 2003, and now Visual Studio 2005, Microsoft still retains OleDB as a key component for connectivity. The OleDB has become the Universal Data Access technology, and one could connect to most of the databases that includes client/server RDBMS, ISAM databases such as JET, dBase, FoxPro etc, spread sheet based data, and even text files. This makes it possible to connect from the most recent, to the oldest of the text based legacy systems.
Establishing an OleDB Connection to an Access database
This article will show you, step-by-step, how to connect to a Microsoft 2000 database starting from scratch. Some of the prerequisites are the following installed components: Windows 2000 or Windows XP Professional and Microsoft Access 2000 which comes bundled with Microsoft Office 2000.
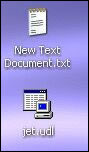
Step 1: Right click on an empty area in the desktop to open up a contextual menu, a text file, by choosing the New option. This creates a new document on your desktop called New Text Document.txt. After this document is created right click this document to rename it. In this tutorial it has been renamed as jet.udl [the extension udl stands for Universal Data link]. When you try to rename the file, you may get a warning from the operating system that your action may make the file unusable. Just ignore this warning, and change it. You may name it anyway you want, but the extension should be UDL. This is shown in the following picture. With this action you have created a universal link to the data. In the next step you will configure this file.
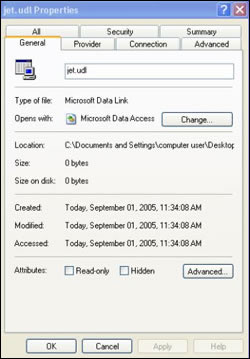
Step2: Right click this file and choose the properties item from the contextual menu. This opens up this window with default tab, General that shows the properties of this file, jet.udl. This file is a Microsoft Data Link file that opens up a vast playing field with regard to database connectivity.
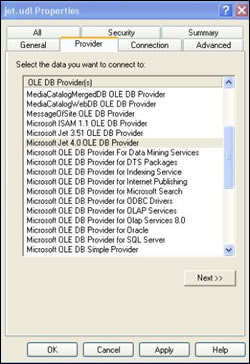
Click on the Provider tab. This opens up the next window which shows a plethora of providers of all types; from RDBMS to Data Stores all the way down to text files. Here is where you can see the vast possibility of connecting to almost any type of data. Since we are interested in connecting to an MS Access database, the Microsoft Jet 4.0 OleDB provider [a provider is like an intermediary] has been chosen. The 3.51 provider is for connecting to an older version, such as Microsoft Access 97, for example.
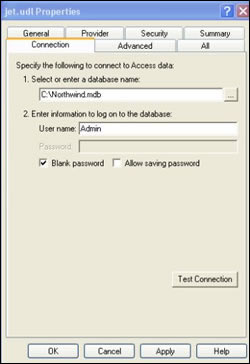
Step 3: The next step is to make the connection to the database. Click on the tab, Connection. This opens up a window - an interactive form in which you need to fill in some information regarding the database you are connecting to, for data access. You may click on the ellipsis button, ... to open up the directory on your desktop machine. Herein, the database Northwind.mdb has been chosen. To keep matters simple, the user name is the standard, Admin. It is possible to change this later as will be seen. You may also test this connection which gives you reassurance that everything is going to be alright.
Step 4: The security of the file is very important. Clicking on the tab, Security, opens up the following window where several users have been given access as shown. The various users and groups that can access the file are shown here. It is possible to make changes to the access permissions here. You may verify that the Administrator has the most permissions.

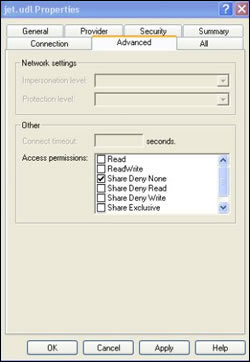
Step 5: Actually you have finished making the connection for all practical purposes with Step 4. In this step you will see a few advanced options by clicking on the Advanced tab. This opens up the next window where you can make choices as to how data is going to be shared (aka Access Permissions). The default is Share Deny None.
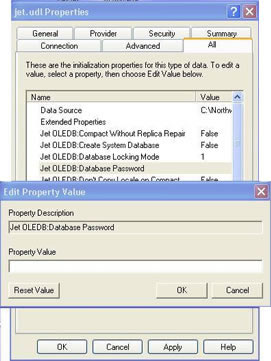
Step 6: Finally you can see all the properties you have configured for this connection in the tab, ALL. This is shown in the next picture. If needed some of the properties may be changed here. You just need to double click on the line item to change as shown here for the JetOLEDB: Database Password.
Summary
The step-by-step procedure described here helps you easily to make a OLEDB connection to an MS Access database on your desktop. You may also make a connection to a database on a network drive just by browsing to the resource in step 3. In the next tutorial you will see how this connection can be invoked in a visual basic application that connects to the MS Access database.